Getting Started with Local Development for Pico-8 and VS Code
Here is the setup to do Pico-8 development outside of the native IDE.
Pico-8 is a fantasy console, particularly notorious for the harsh limitations it is build upon (128x128 screen size, 16 color palette, 32k cartridge size, etc). These limitations have intentionally been chosen to encourage small creations and self-control. Pico-8 comes with it’s own editor, so it might seem to go against the spirit of Pico to develop in an outside IDE. I’m not going to argue either way. Personally the font choice (despite being incredibly cute) is particularly hard to read and one of the main reasons for my desire to write pico-8 code in my editor of chose.
In this case I’m using Visual Studio Code on the Mac, but the setup will be very similar on other editors or OSs like Sublime or Windows.
Steps for setting up Visual Studio Code for Pico-8
STEP 1. Get Pico-8 binaries
If you haven’t done it already, go buy Pico-8. It costs $15 and you will be joining a community of enthusiasts and supporting its development.
Link: https://www.lexaloffle.com/pico-8.php?#getpico8
Congrats! Go download the app next. I’m going with macOS.
Link: https://www.lexaloffle.com/games.php?page=updates
STEP 2. Setting up an external editor
The Pico-8 Manual includes some high level notes on using an external text editor.
You can edit .p8 files directly in an external editor, but I don’t recommend it since the .p8 file contains more than just code that has to be edited in pico (sprites, maps, music…). This could create potential conflicts when your external editor and pico-8 are both editing the same files.
Instead, modify .lua text files in a separate editor and include them in the cartridge’s code using #INCLUDE YOURFILE.LUA when running it.
The steps below help with configuring different aspects of VS Code to make development friendlier:
- Theme (and font)
- Syntax highlighting
- File management
- Debugging and logging
- Running Pico-8 cartridges from within VS Code
STEP 3. Configure VS Code UI Theme
Ok, so there is a Pico-8 theme to make your editor still feel part of the core Pico-8 development experience. You can download and install it here:
https://marketplace.visualstudio.com/items?itemName=ianjsikes.pico8-theme
This theme can skin the full IDE or just the editor window. It also includes syntax highlighting for .p8 files.
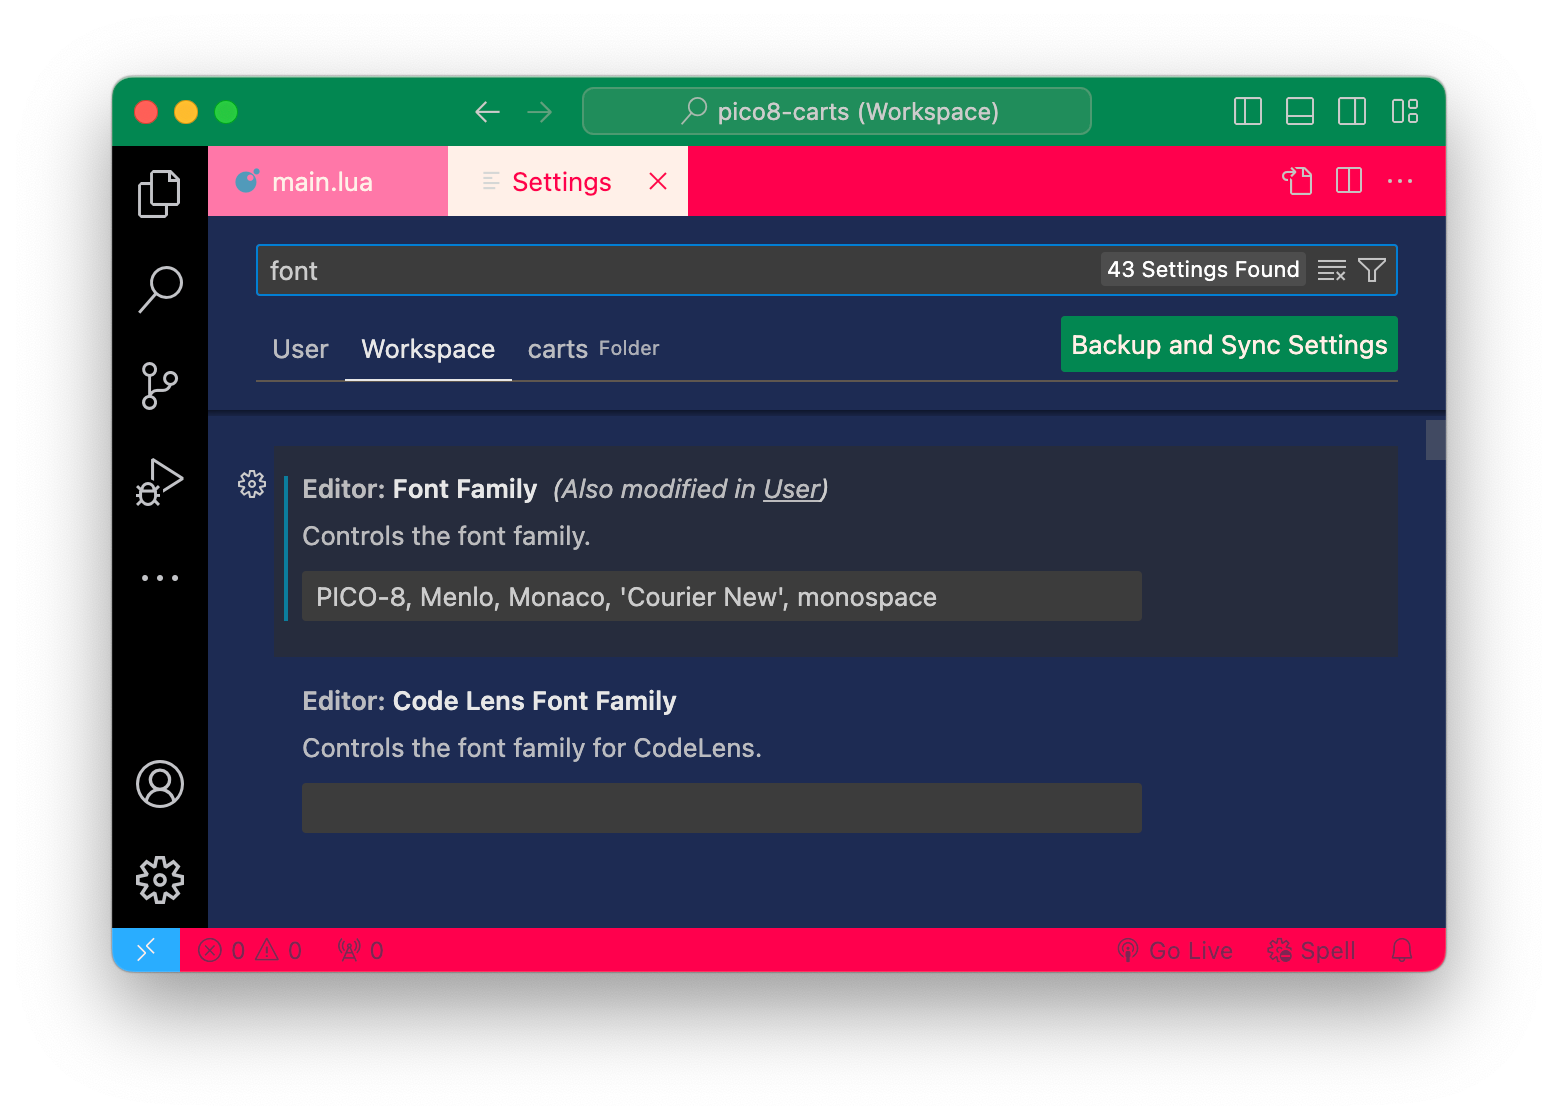
STEP 4. Configure VS Code Font
If you really want the experience of writing pico code as close as possible to the native IDE, you could go as far as using the Pico-8 font.
First, download one of these font files:
- PICO-8 - https://fontstruct.com/fontstructions/show/2052852/pico-8-27
- PICO-8-0.2.5 - https://fontstruct.com/fontstructions/show/2164414/pico-8-27-1
Next add the string PICO-8 under Settings > Workspace > Text Editor > Font > Font Family
STEP 5. configure Pico-8 code folder
Before you can create your own files to write code in, you must tell pico-8 the location of your local development folder. We are going to tell pico-8 both the root path and the cartridge data path for pico to use when running.
This configuration can be found on pico-8 config.txt file. Per the official documentation, the location of the file depends on the host operating system:
- Windows:
C:/Users/username/AppData/Roaming/pico-8/config.txt - OSX:
/Users/username/Library/Application Support/pico-8/config.txt - Linux:
~/.lexaloffle/pico-8/config.txt
In macOS you can type the following to open the file inside VS Code:
code ~/Library/Application\ Support/pico-8/config.txtUpdate root_path and cdata_path with the path to your work folder.
// Location of pico-8's root folder
root_path /Users/username/my-pico-path/pico-8

// Location of cartridge save data
cdata_path /Users/username/my-pico-path/pico-8
In my case I am telling pico where the root of all my p8 code will be. Inside this folder I plan on having other sub-folders to organize my projects.
STEP 6. Create your program files
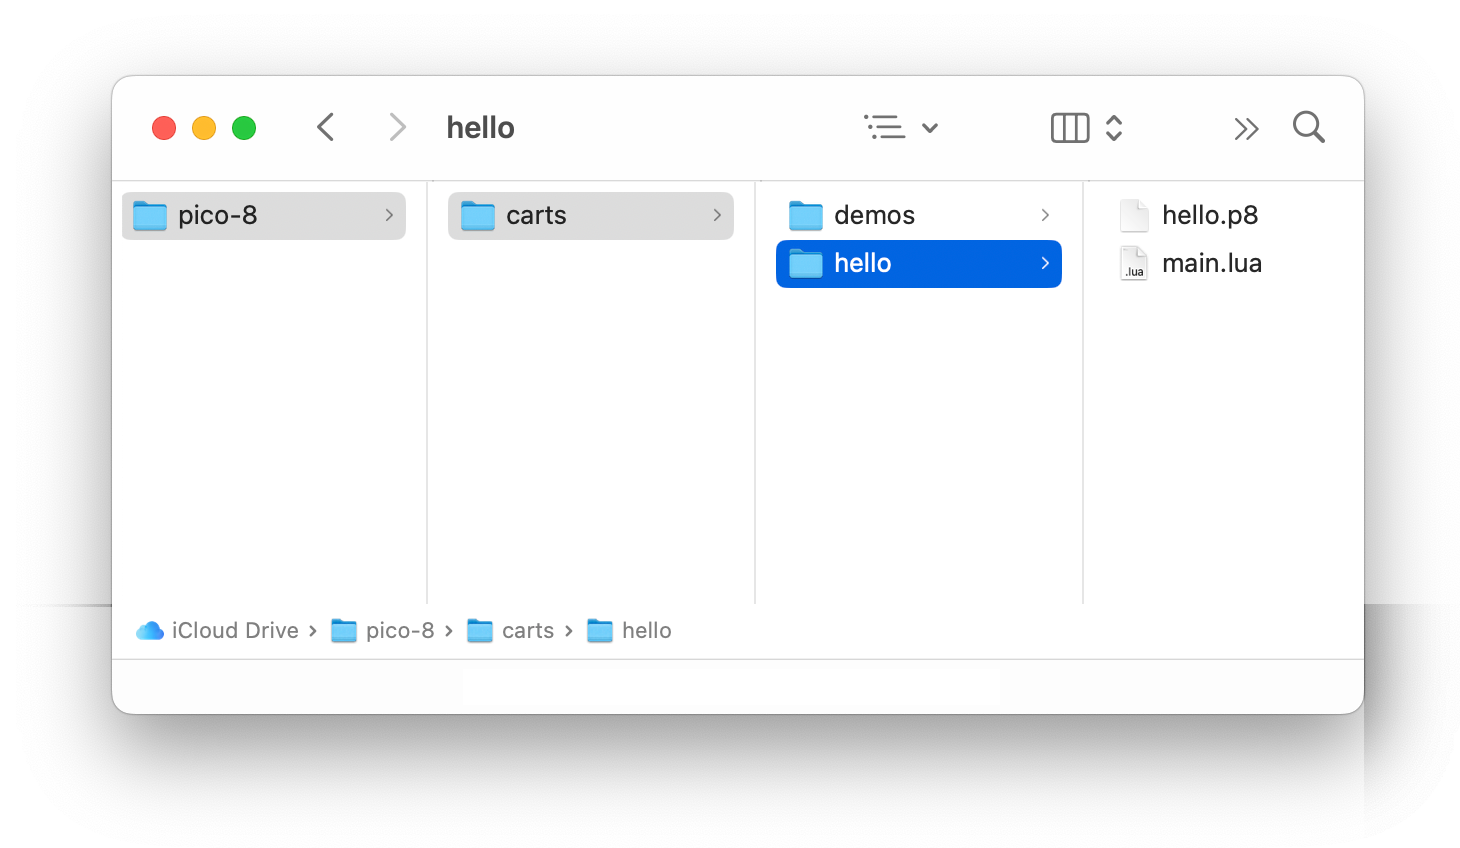
Create a folder for your project. Place the .p8 file you want to work with in the folder. If you don’t have a .p8 file create one. You also need to create a .lua file that will contain your code.
Here is how you can create these two files from the command line:
touch hello.p8
touch main.lua
You should end up with something similar to this:
STEP 7. Write hello world pico-8 program
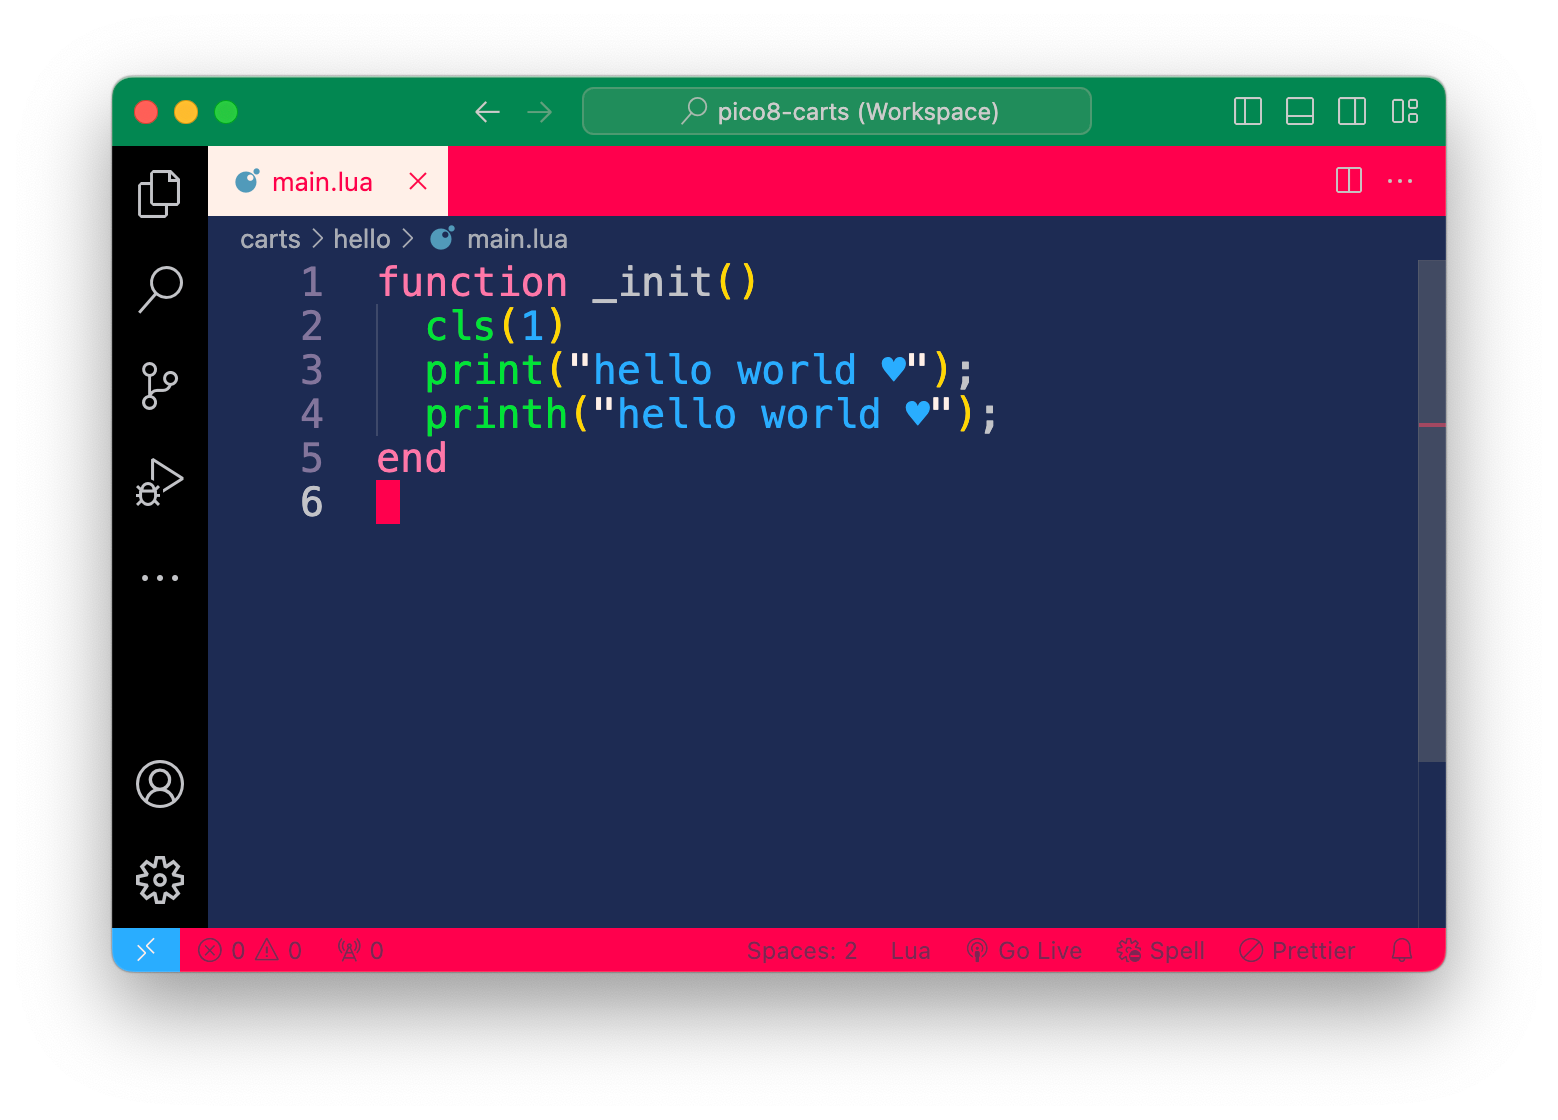
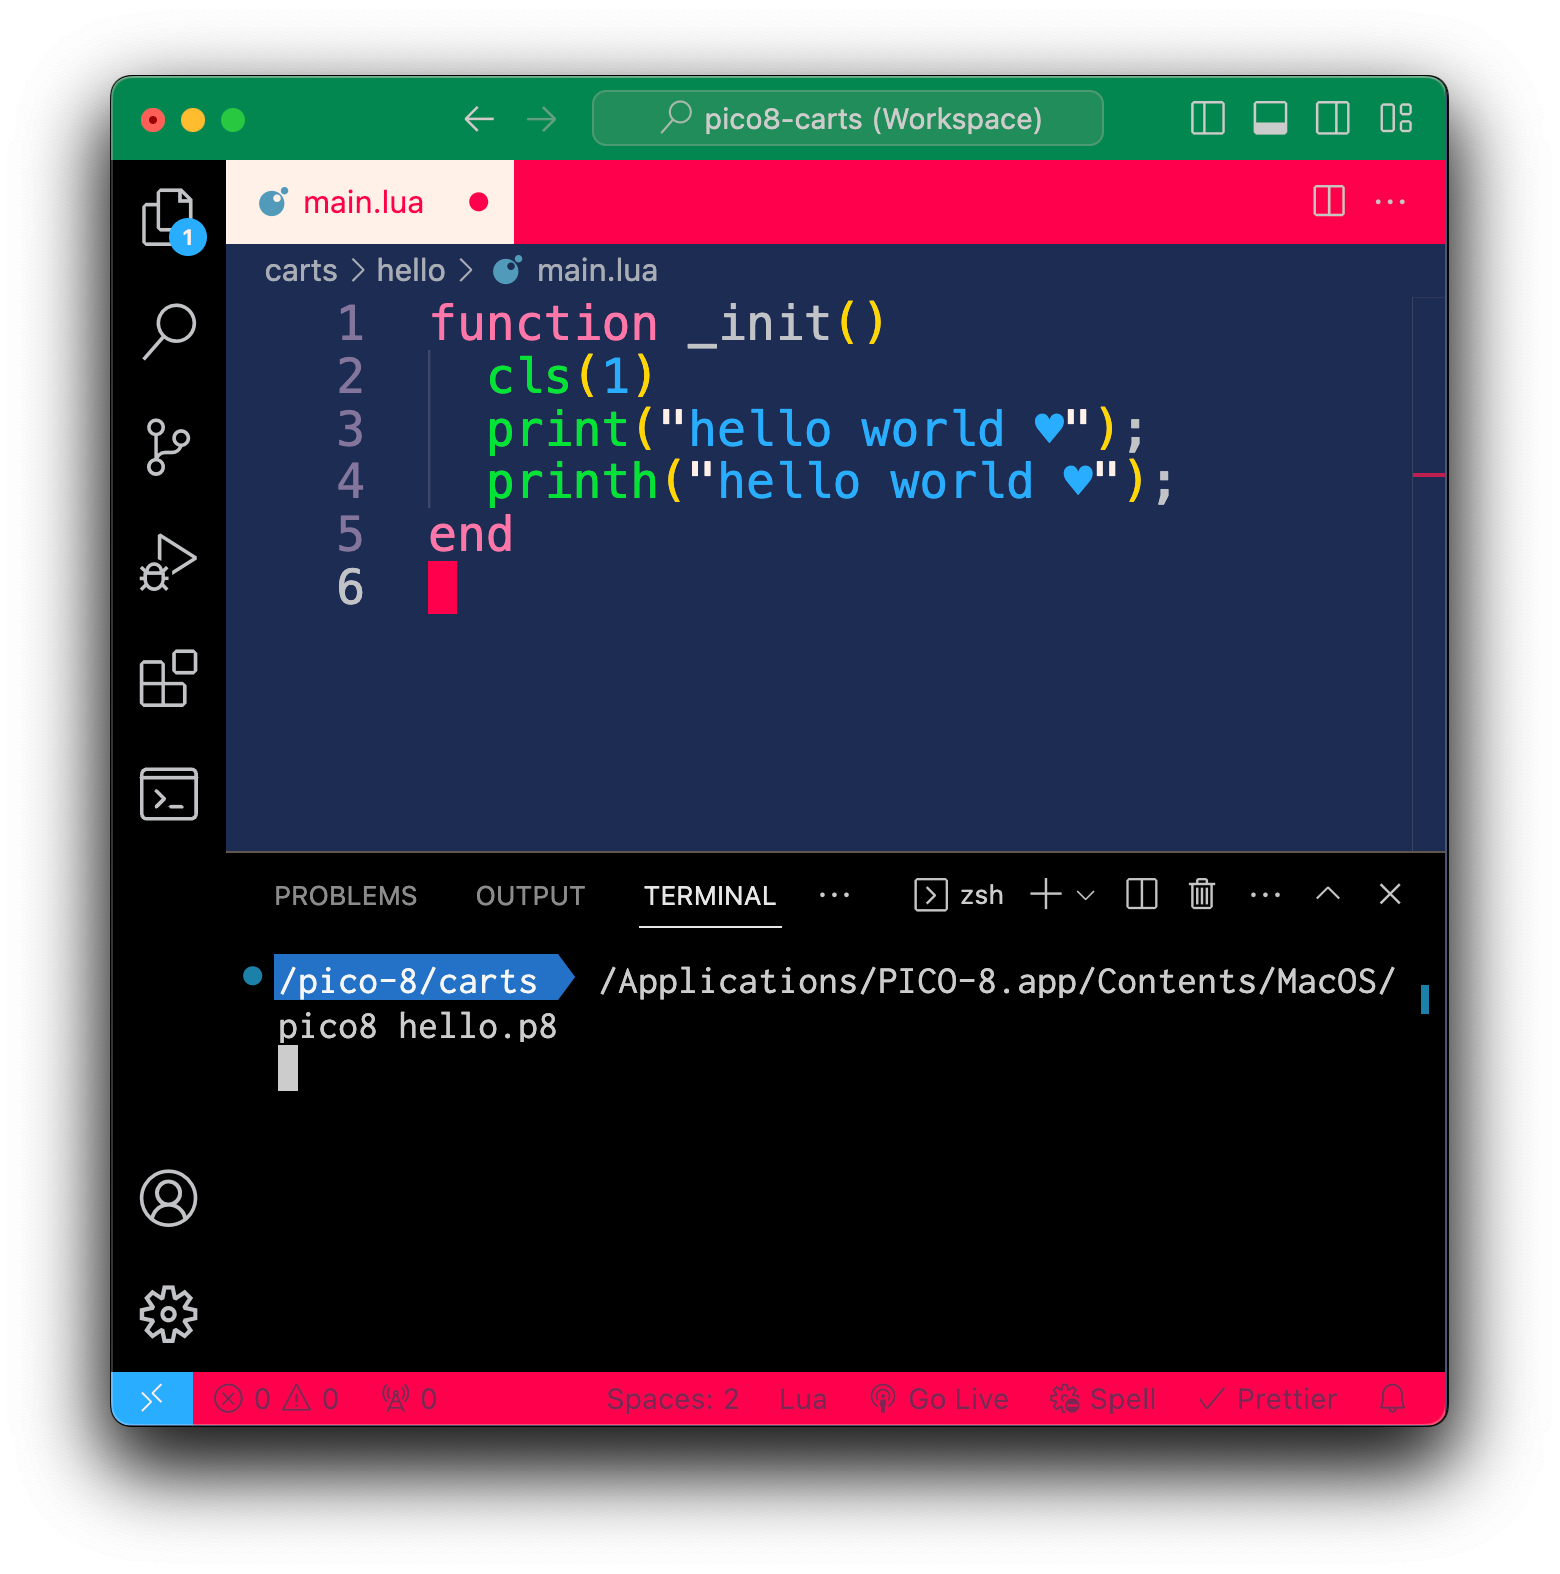
Open the .lua file in VS Code and write your program. Here is a simple example:
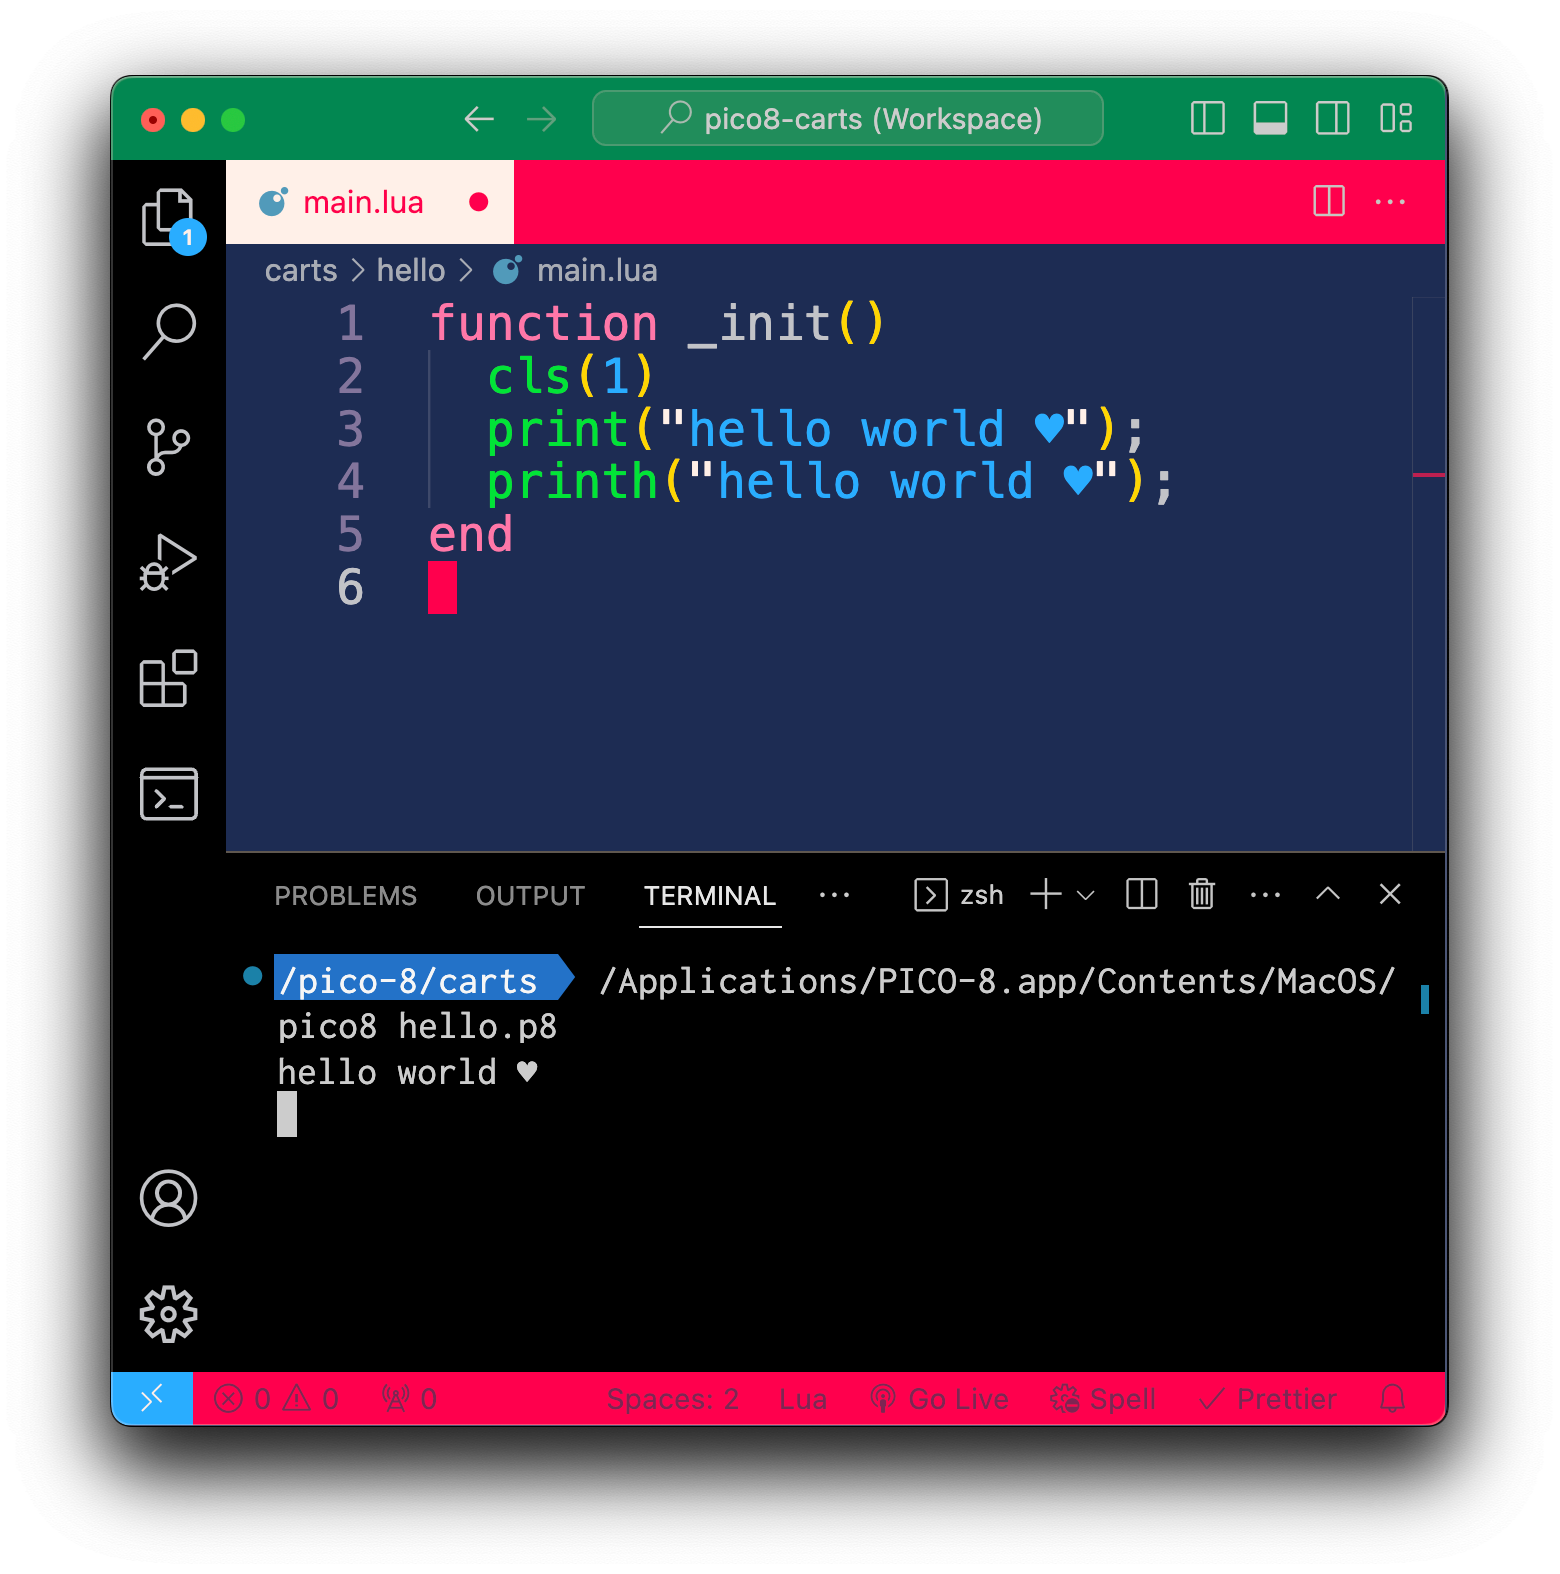
function _init()
 cls(1)
 print("hello world ♥");
 printh("hello world ♥");
end
This way we have crated a development environment that mirrors pico-8 own editor inside of VS Code. Now we can take advantage of larger screen real estate, code folding, and any other IDE enhancements you’d like.
Next we need to include the .lua file we just created inside our main .p8 file. To do so we will launch Pico-8 and use the #include directive in the code editor.
STEP 8. Launch Pico-8 and load the cartridge from the command line
One convenient way to launch Pico-8 is simply opening the .app file by double clicking. You can then drop a .p8 file on the window and the cartridge content will load.
In our case, however, we are going to launch Pico-8 and load the cartridge we created earlier from the command line.
Here is how you do it:
/Applications/PICO-8.app/Contents/MacOS/pico8 hello.p8Alternatively you could create an alias to pico8 so you don’t have to type that long command. Open your shell configuration file (eg. code ~/.zshrc) and add an alias like this:
alias pico8="/Applications/PICO-8.app/Contents/MacOS/pico8"Since we are using VS Code we can open a terminal from within the editor and launch Pico-8 without leaving our IDE. Use Menu > Terminal > New Terminal to open a new terminal.
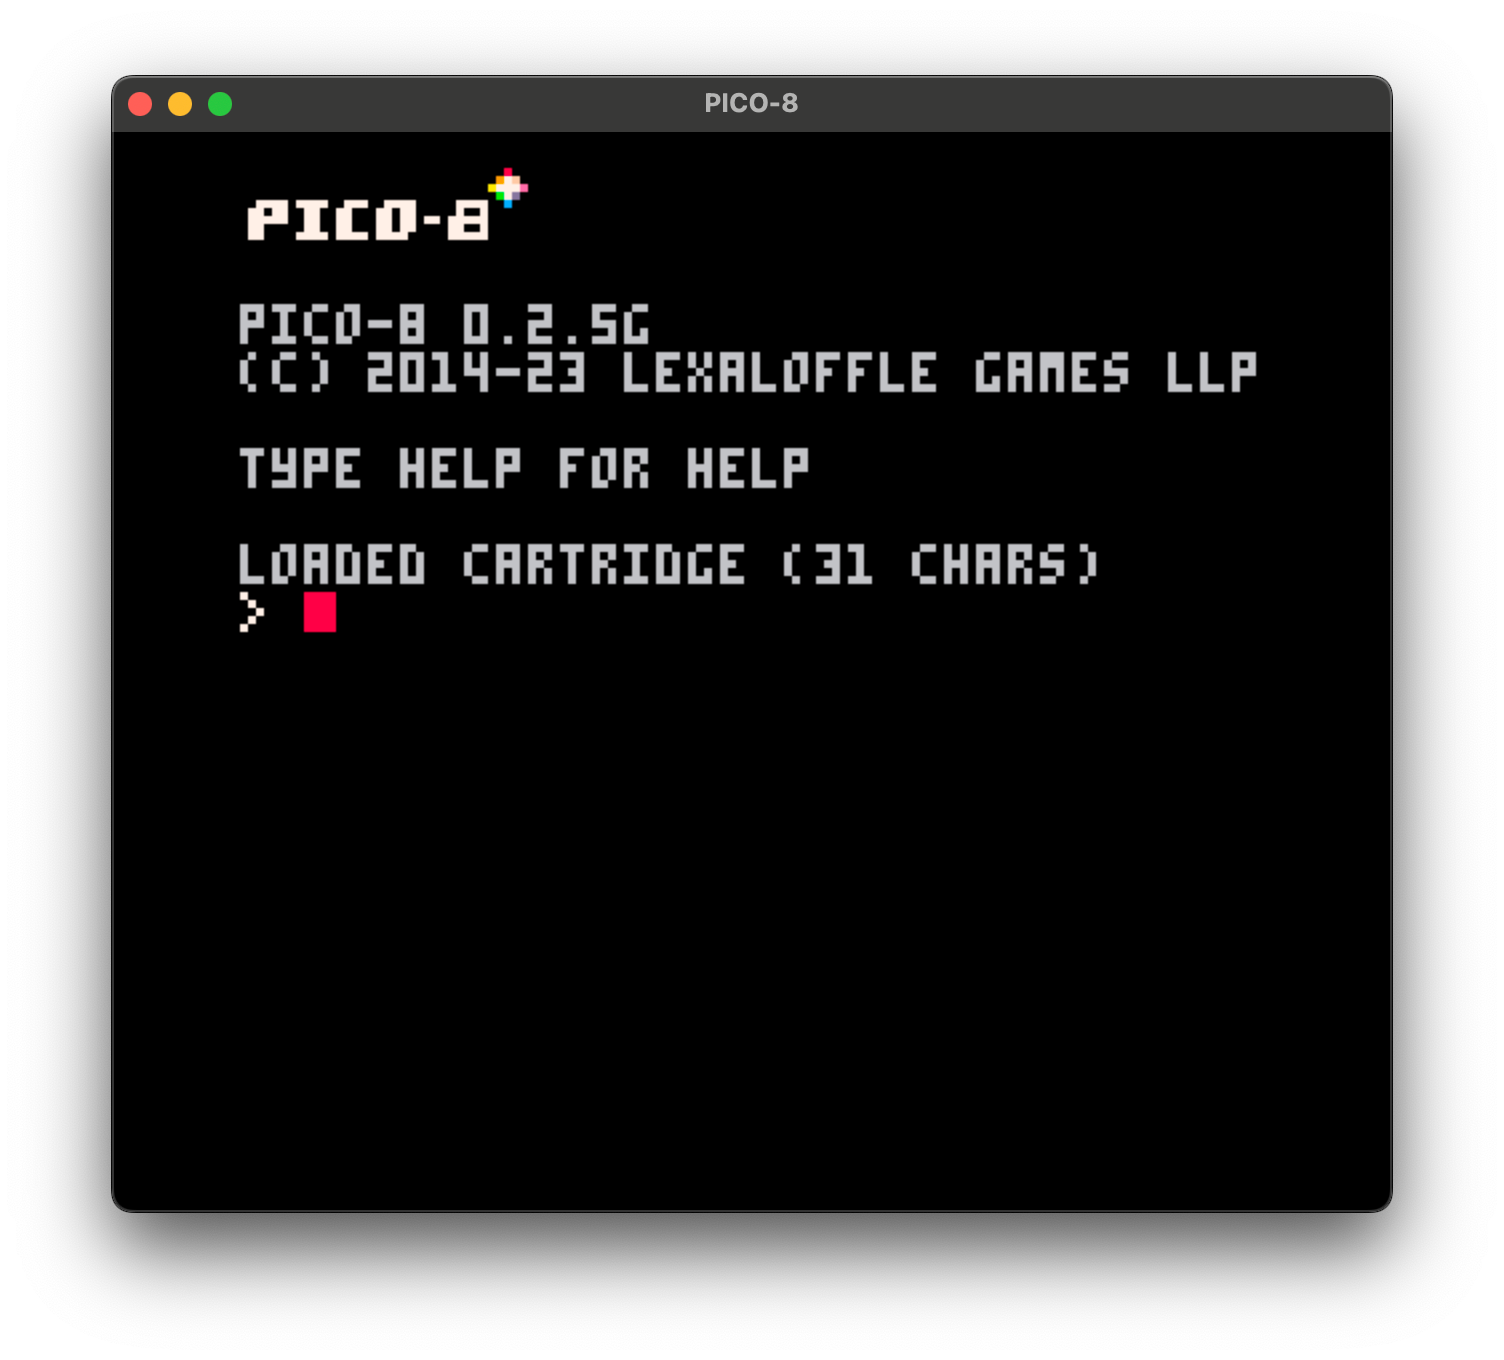
Pico-8 should launch and you should see a message that the cartridge was loaded successfully.
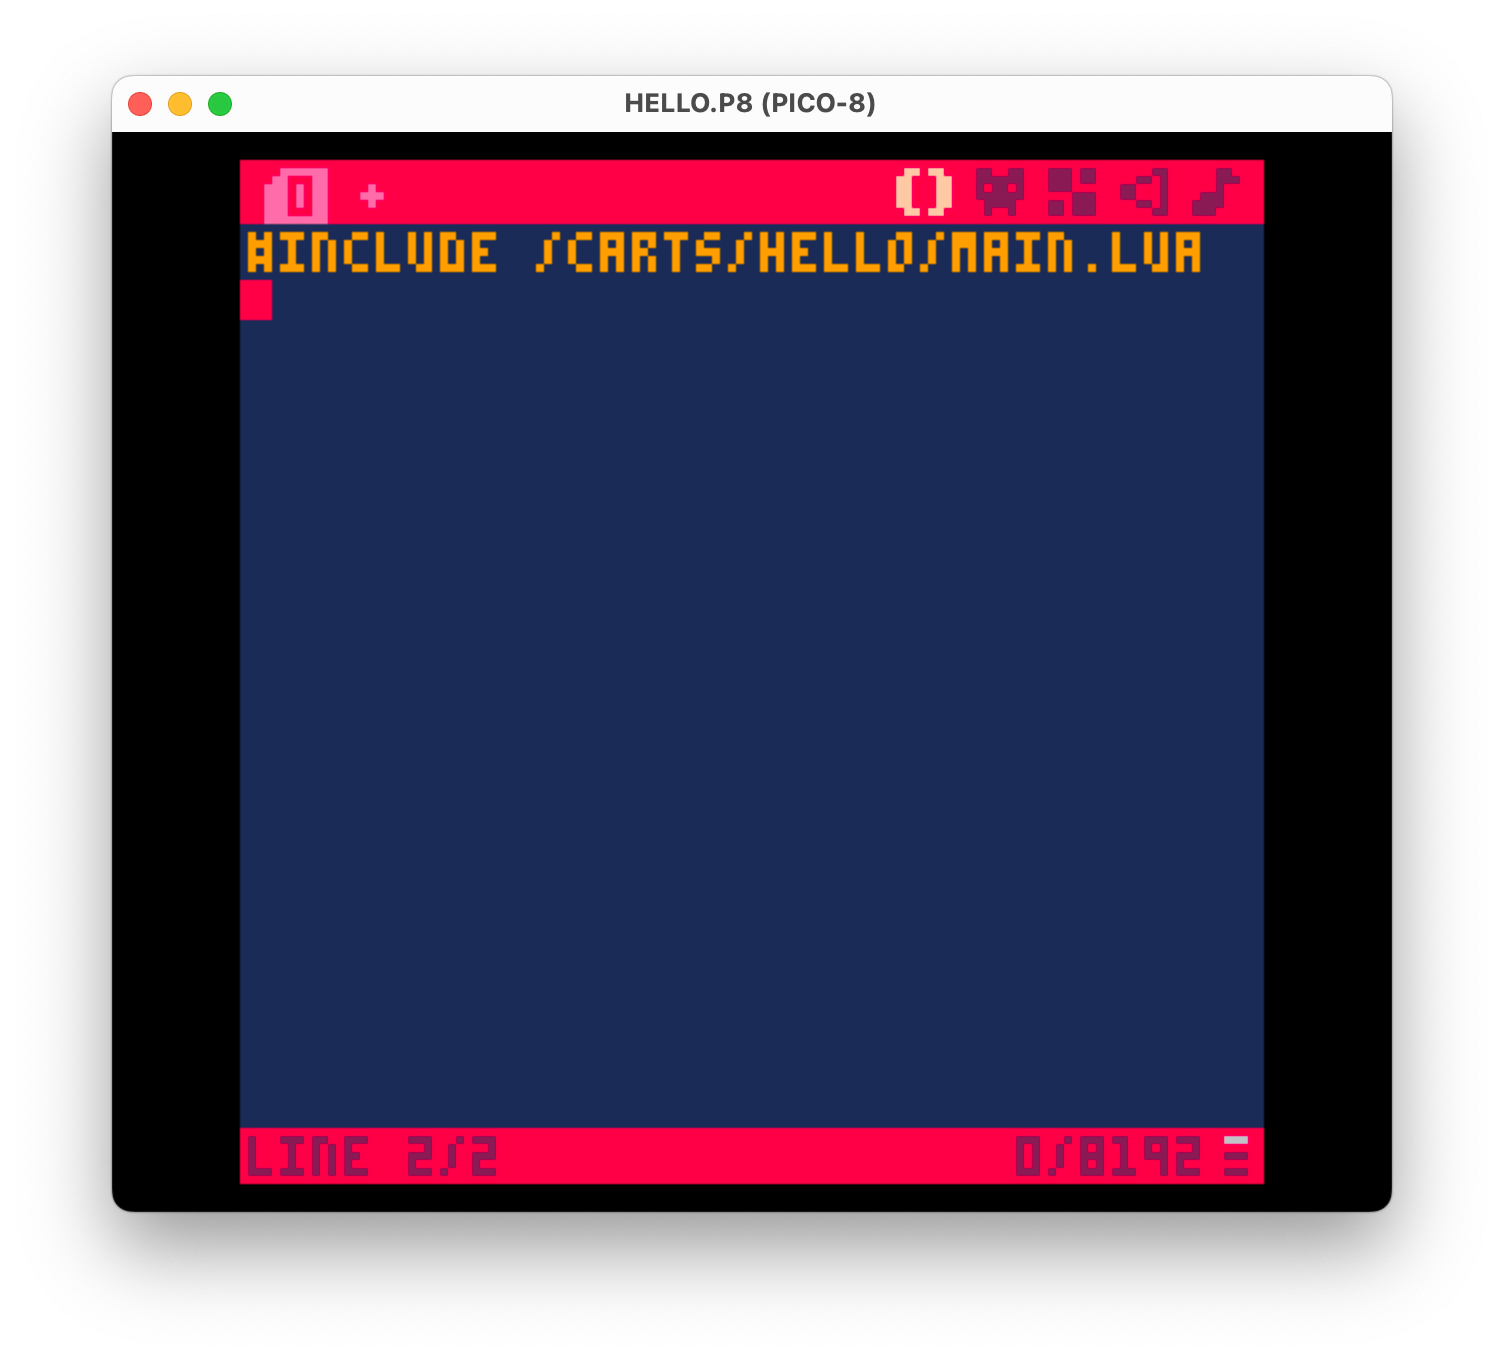
STEP 9. Include your LUA file inside of Pico-8
From within Pico-8 open the code editor by pressing ESC. Once inside the editor include the newly created .lue file using the #include directive as follows:
#include /project-folder/main.luaPay attention to the folder your .lua file is located relative to the cdata_path value you entered in the config.txt file in the steps above.
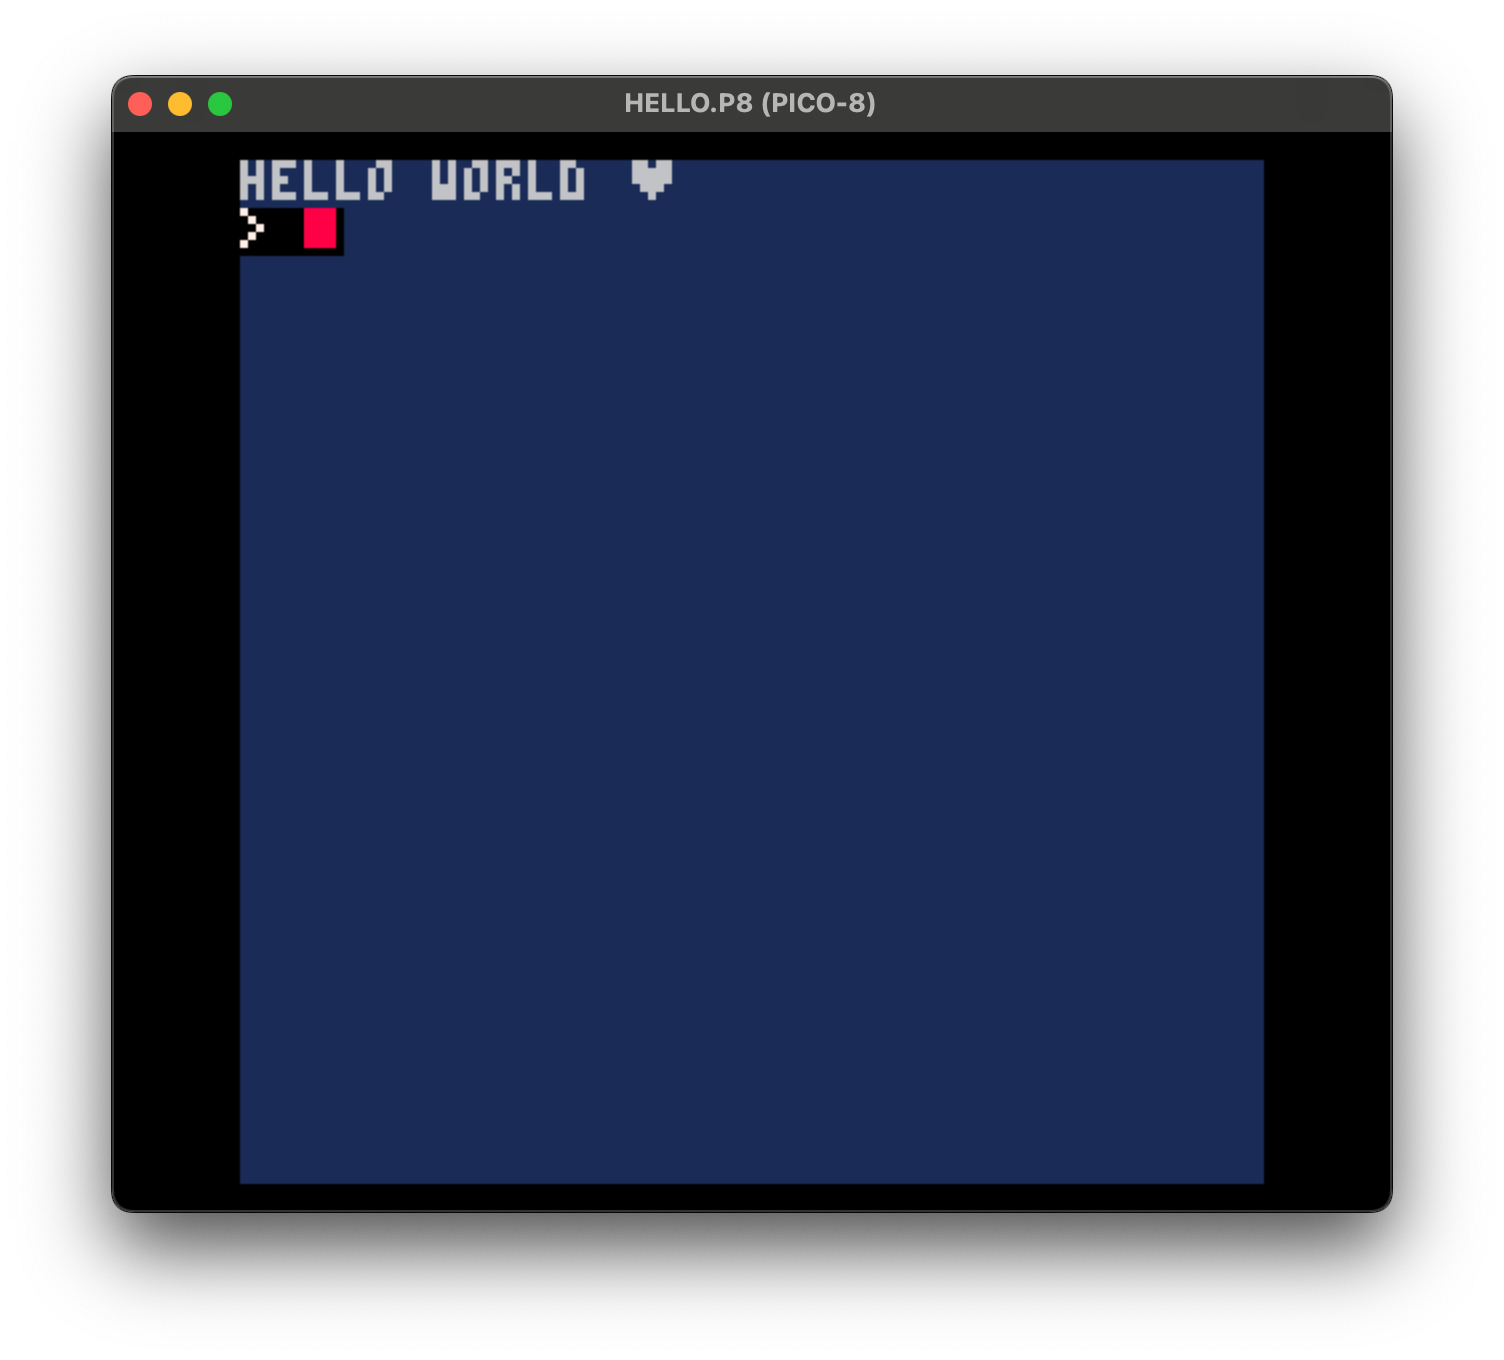
STEP 10. Run the program
Run your cartridge either with the RUN command or Ctrl+R. If everything was set up correctly the program will run. In our case the screen will paint a background color and our epic “Hello World” message will be printed.
STEP 11. Start coding and start debugging
One reason to launch Pico-8 from the command line is to use the printh function to output text to the terminal. This is how to use the terminal for debugging, just like the browser console is used for web development.
Given the code sample above a “hello world ❤” message will be printed on the screen (via print) and on the terminal (via printh).
If you need it printh also allows for the output to go to a file. Here are some notes on how to use printh: more info here and here.
That’s it
Now you can launch pico-8, edit code and debug your programs all within VS Code. Below are a few more resources if you want to dig deeper into this.
Bonus: Plugins for VS Code
Here are some plugins to make your life easier in VS Code when writing Pico-8 programs.
- Lua syntax highlight
- Pico-8 is a subset of Lua, so you could use a regular Lua syntax highlighter for your pico
.p8files.
- Pico-8 is a subset of Lua, so you could use a regular Lua syntax highlighter for your pico
- PICO-8 Language Server
- Description: “Full language support for the PICO-8 dialect of Lua.”
- (Last updated: 9/26/2023)
- Pico-8 VSCode Plugin
- Description: “This plugin provides facilities for editing Pico-8 p8 files in VSCode.”
- If you want more automation, this plugin has features for “launching Pico-8 to open or run a cartridge from within VSCode.”
- (Last updated: 10/3/2018)
- pico8-theme
- This is the recommended theme as seen above if you are looking for an experience as close to native Pico-8 development as possible.
- Description: “A VS Code color theme in the style of the PICO-8 fantasy console by lexaloffle.”
- (Last updated: 4/18/2019)
- pico8-simple-outline
- Description: “For PICO-8 files (.p8), display functions in the Outline by using a rudimentary regex.”
- (Last updated: 11/8/2020)
Also: More resources
- Pico-8 User Manual
- PICO-8 Wiki
- Cheatsheets:
- [video] - PICO 8 Tips - Using External Tools (by Kevin Thompson)
- ianjsikes/pico-build -
- Description: “A simple build tool for multi-file PICO-8 projects”
- Awesome PICO-8
- Description: “A curated list of awesome PICO-8 resources, carts, tools and more.”
- Forums:
- [forum] - Lexaloffle BBS
- [forum] - Reddit